I am going to post all the passport tour pages and instructions in this post. Please be sure to remin us to give you your pages. It's not that we don't want to give them to you, it's that we forget since it is not something we do everyday.
Cover Instructions
Memory Treasures
410 663-6726
info@memorytreasures.com
Materials Provided:
1 12x12 sheet patterned paper
½ sheet (6x12) Blue patterned paper
Stickers
2 tags
Materials needed, not supplied:
ColorBox fluid chalks – Amber Clay and Azure (or similar colors)
VersaColor pigment ink – Sage (or similar color)
Instructions:
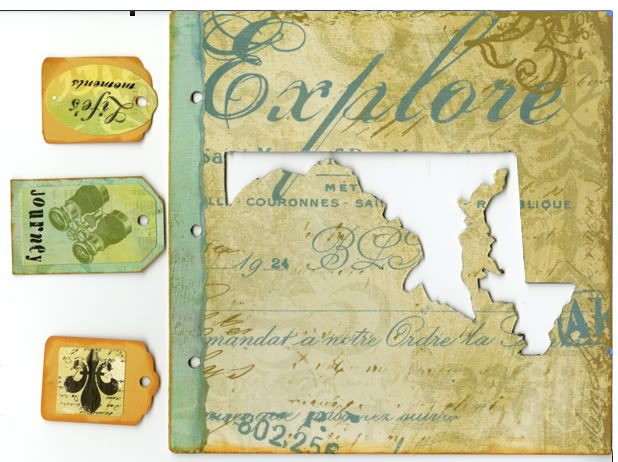
1. Cut the 12x12 sheet of paper to 8x8. Cut paper so that the word “Explore” is across the top.
2. Adhere to the chipboard cover. (I used Mod Podge)
3. After the paper dries completely, use a craft knife to cut around the “Maryland’ map. Sand any rough edges.
4. From the same patterned paper, cut a 4x8 strip and tear approximately ¼ in from the length. Ink the edges if desired. ( I used Sage)
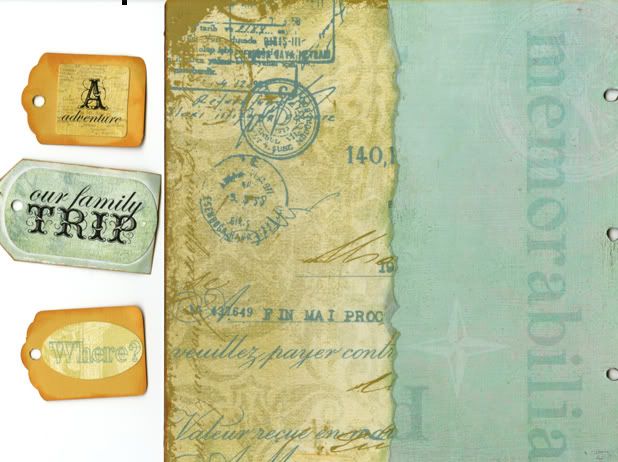
5. Cut the blue 6 x12 strip so that you have a 4 3/4” x 8” strip.
6. (NOTE: before adhering, make sure words are right side up/facing appropriate direction. – I’m sure no one would make this error but just in case….) Adhere the blue strip to the back cover (side with holes). Adhere the inked patterned paper so that it overlaps the blue.
7. From the remaining blue paper, tear an 8” strip so that it approximately 5/8” wide. Ink the torn edge with Azure. Adhere the strip to the left side of the front cover.
8. ModPodge the front and back covers and allow to dry completely. After drying, a second coat may be applied if desired.
9. Using a piece of the leftover blue paper, cut a tag shape – 2 ¾” x 1 5/8”. Ink the reverse side (white) with Sage and Azure.
10. Using the Amber Clay, ink the outer edges of the tag you just made as well as the 2 dark tan tags provided. Ink edges of BOTH sides. Select stickers from the provided sheet and adhere one to each side of each tag. ( I choose our “family trip” and “journey” for the blue tag. I used “Where”, “Life’s Moments”, “A adventure” and the “fleur de leis”.)
11. Punch holes in the tags and place on the jump rings.
12. Ink edges of both covers with Amber Clay.
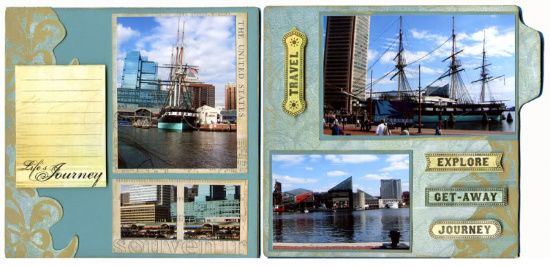
Here is the two page spread from Great Scraps in Millersville.
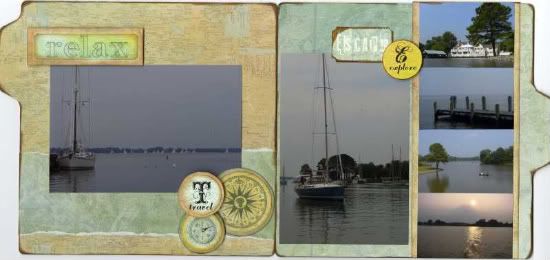
Here is our Page from Photo Scraps. I edged all the edges with Chestnut Roan Chalk ink and used pop dots to lift up a few of the stickers.
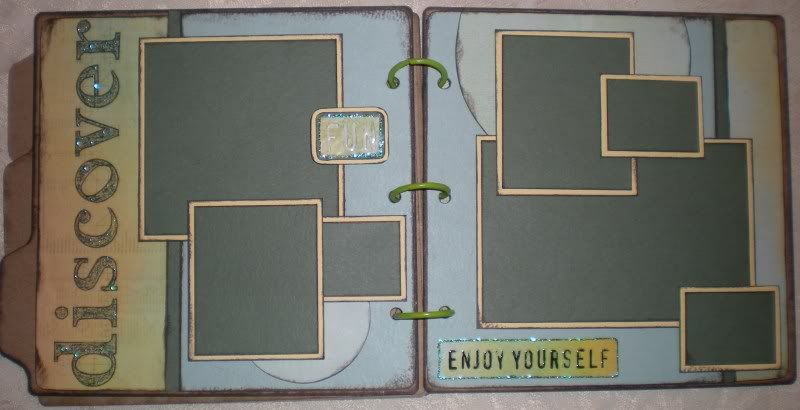
Here are the pages from Scrapbooks & More in Frederick.

The final two pages are from Scrapmania in Hagerstown.
1 comment:
Thanks so much for posting all the pages!
Cheri O
Post a Comment